How to Successfully Run Facebook Ads for Amazon Single-Use Coupon Codes – Tested Tips, Thorough, Step-by-Step Guide& More
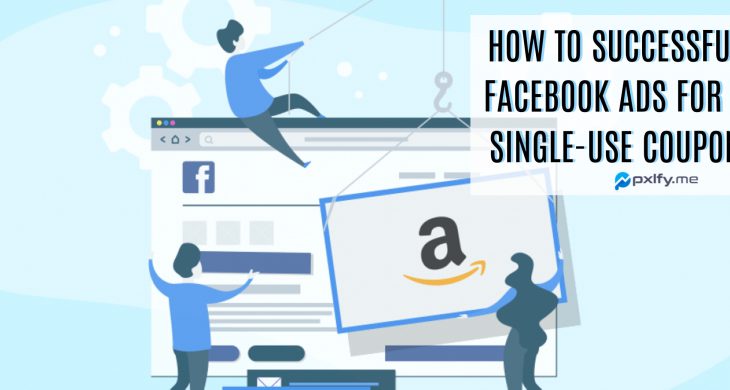
Table of Contents
Amazon single-use coupon codes are undoubtedly a great way to get sales to boost your products.
However, most of the sellers on Amazon cannot reap the maximum benefits of their promotions simply because of inadequate or amateur marketing.
This is why we have created a step-by-step guide for you to not only set up your Amazon promotion but also to create a highly powerful Facebook ad to market this promotion.
Let’s get started!
What are Facebook Ads?
Facebook Ads is the system through which you can advertise your product or business to the people on Facebook as well as to additional applications such as Instagram and Whatsapp.
The user dashboard allows you to conduct thorough testing of different types of demographics to judge what type of marketing content works best. Not only that but it allows your brand to be introduced to wider demographics that are most likely to be interested in what you have to offer.
It’s a cost-effective tool for conducting digital marketing on a number of different social media platforms. Facebook has almost 3 billion users, so it would really be a missed opportunity if you don’t take advantage of its insanely large user base.
Advantages of Facebook Ads
You may still be apprehensive about Facebook ads but trust us when we say it has a ton of benefits that could really increase sales.
Some of the advantages of Facebook ads include:
Customer Targeting is Highly Accurate and Easy
Facebook collects a lot of data about its users and companies can use this data to more accurately introduce themselves to their target audiences.
As a company, you will have developed customer personas which are the descriptions of ideal customers that would be interested in your brand. Coupling this information with Facebook ads can allow you to identify target demographics that’d be ideal for your product.
Thus, it allows you to show your content to a demographic that’d be most likely to respond to it.
Very Large User Base
As mentioned earlier, Facebook has the largest user base out of any other social media platform. Thus, it’d be a severely missed opportunity if you did not run ads for your brand on this specific platform.
With so many people on it, it’s more than likely that people who are interested in your brand will also be on it.
Furthermore, since Meta owns both Facebook as well as Instagram, they can easily be integrated with each other. Thus, not only do you gain access to the audiences on Facebook but also the audiences on Instagram.
Track Metrics in Real-Time
The great thing about digital marketing that is perfectly exemplified in Facebook ads is the fact that you can track performance in real-time.
You can simultaneously gauge performance as you try out new marketing content or run certain ad campaigns on Facebook ads.
Since you can monitor metrics in real-time, this can help you judge whether a certain strategy or campaign is working effectively or not. If it’s not, you can easily change your efforts to correct course.
Disclaimer: You should not post your affiliate links directly to Facebook. That is strictly against Amazon’s guidelines and something that you’ll be heavily penalized for.
Check out how Facebook ads are great for your business HERE.
How to Successfully Run Facebook Ads for Amazon Single-Use Coupon Codes?

Set-up Your Promotion on Amazon
The very first step for creating an ad for your Amazon promotion is obviously to set the promotion up first.
So, go to your Amazon seller account, and under the “Advertising” tab, click “Promotions”:

Now, you’ll see a 3-step “Create a Promotion: Percentage Off” page.
Let’s go through each of these steps one by one:
Step 1: Conditions
First of all, you need to specify the basics of your promotion, like which product is this promotion for, how much discount are you going to offer etc.
The very first thing to do is to create a product selection:

Enter the required details on the next page as indicated:

Write the name of your product and just copy that down for “Internal Description” as well.
The main thing on this page is actually your product’s ASIN, so enter that carefully. Once you’re done with that, hit “Submit”.
Tip: Instead of getting your ASIN from the Amazon inventory, you can simply go to your product’s listing and copy the ASIN from Amazon URL:

After creating your product selection, go back to the “Percentage Off” page. (Go to “Promotions” under the “Advertising” tab and hit “Create” in the “Percentage Off” category.)
Now, you will be able to see the product selection you just created in the “Purchased Items” drop-down menu:

After selecting the right product, enter the amount of discount you want to offer in this promotion. For example, if you want to sell it at 80% off, just enter “80” next to “Buyer gets”:

Step 2: Scheduling
In this section, you’ll need to specify the schedule of your promotion i.e., the starting and ending date and time of your promotion.
So, for the “Start Date” and “End Date”, just enter the date and time of your promotion’s schedule. For one-time coupon codes, it’s best to let the promotion run for a few days.
You also need to enter a suitable “Internal Description” for your promotion like this:

Step 3: Additional Options
In the Additional Options section, just check the indicated options and hit “Review”:

On the review page, go through your entered details and check for possible errors. Once you’re done with that, hit “Submit”:

You will now be redirected back to the Promotions page.

Step 4: Manage Claim Codes
On the Promotions page, go to the “Manage Your Promotions” tab, select “Pending” from the “Promotion Status” drop-down menu, and hit “Search”:

You will now be able to see the promotion you just created:

Click on the Tracking ID of your promotion to view your Promotion:

Hit “Manage claim codes”.
Now, enter a suitable name for your codes’ “Group name”, and the number of codes you want to offer in your promotion (For example: 100). Hit “Create” once done:

You will now be able to see your new code groups at the bottom of the page:

Click “Download” to get your codes. (Note: if the download option isn’t available, just refresh your page and you’ll see it once the page refreshes.)
Your downloaded file will look something like this:

It will be a zipped folder, so extract it. Inside the extracted folder, you’ll find a text file containing all your discount codes:

These are the codes that your buyers will use to avail the promotion. Just hold on to these for now, and set up your Facebook ad.
Set Up Your Facebook Ad
By now, you’ve successfully set up the promotion on Amazon. It is now time to go to your Facebook page and create an ad for this promotion:
- Set-up your Facebook Ad Campaign
- The entire Facebook ad setup consists of 3 sections:
- Campaign
- Ad Set
- Ads
You have to create content that appears on your audience’s feed to make them stop whatever they are doing and engage them immediately.
Check out the tips to Create an Enticing Facebook Ad HERE.
Let’s go through each of these sections one by one:
Step 1: Choose your Campaign Objective
First of all, go to your Facebook Ads Manager and click “Campaigns”. Then click “Create campaign” in the upper left corner:

Select “Traffic” as your marketing objective:

Write a suitable name for your Campaign, and hit “Continue”:

Step 2: Create an Ad Set
Ad Set basically handles your targeted audiences, so an “Ad Set” means the demographics of the audience you’re going to target.
Write a suitable name for your Ad Set and in the “Traffic” section, check “Website”:

Turn on the “Offer” button. Select your brand’s Facebook page where indicated and hit “Create offer”:

Step 3: Create an Offer
In order to create your offer, you’ll need to provide offer details, offer schedule, coupon codes etc.
First, enter an attractive “Offer Title” along with “Details” for your ad. You’ll be able to see a preview of your ad on the right side as you fill in these details.
Also, specify an “End Date” for your ad: (Make sure this end date is the same as the one you entered on Amazon while creating your promotion.)

Now, you need to enter an “Online Offer URL” and upload coupon codes. These are 2 very important steps of your Facebook ad creation, so we will go through either of them individually:
1. Get your Online Offer URL
This is the URL that customers will click on to go to your promoted product’s page on Amazon.
Your entire campaign’s success depends upon this URL. You can use it to improve your Amazon keyword-ranking, and also to build new, retargetable audiences.
Here’s how to include your targeted keywords to your URL:
Go to Amazon, and search for your product. Find it in the search results and open it. On your product page, click on the product’s seller account (your account). For example:

Next, go to the storefront:

You’ll now see your account’s name right beside the search bar. At this point, carefully enter the keyword you’re trying to rank for on Amazon, and hit search: (Make sure to not make any typos.)

Now, go ahead and copy this URL. You can also see the entered keywords in this URL:

The reason for copying this particular URL is because now, everyone who clicks on this link and buys your product will contribute equally to your keyword rank as someone who actually looked up these keywords on Amazon and ended up buying your product.
Sometimes sellers just paste this URL to their Facebook ads and go to the next step, but we recommend going through another step: use a URL shortener like Pixelfy.me to create a tracking link from this URL, and use that resultant link in your Facebook ad.
It will look something like this:

This only takes a couple of minutes, but the results are huge. Using a tracking link instead of an Amazon link allows you to be able to track the link’s progress in detail.
Most importantly, it provides you with a complete list of customers that clicked on your link.
Tip: This list is a highly valuable Amazon asset. You can retarget all these people on Facebook messenger (to solicit reviews, offer discounts etc.), create lookalike audiences on Facebook and whatnot.
So, once you’ve created your tracking link, just copy it and go back to your Facebook ad.
Paste the link in the “Online Offer URL” section:

After pasting the link, do not forget to select “Unique Codes” as your “Type of Promo Code.”
2. Upload your Coupon Codes.
Start by first downloading the CSV Template file as indicated:

Once it’s downloaded, go back to the text file you downloaded earlier from Amazon containing all your Codes. Copy all those codes:

Now, open the CSV Template file you downloaded from Facebook. It would be an excel sheet, looking like this:

Open this file and paste the copied codes in the first 2 columns (A and B columns):

If you paste the codes only in the first column (column A), that will also work fine for your ad.
The reason why you should also paste them in column B is that if you do so, Facebook will send an email to alert people that their coupon code is about to expire, so they better use it quickly.
Save the excel file and go back to your Facebook ad. Click on “Upload CSV”:

Upload the excel sheet you just edited:

After successfully uploading your codes, enter “Total Offers Available”. These will be equal to the number of codes you’re offering (100 in this case). You would also need to enter “Terms and Conditions” for your ad:

Once you’re done with all this, hit “Create”.
Step 4: Choose your Audience
By now, you’ll be on to the “Audience” section of your Facebook ad creation:

This is the time for you to actually take a moment to determine: who would need your product? Who are your buyers? Because these are the people you want to target with your ad.
Once you’ve decided that, go ahead and enter your audience’s demographic details. Enter their estimated age-range and their gender. For example, if you’re targeting teachers with your ad, your audience will look something like this:

In the next section of “Detailed Targeting” you can narrow your audience down as much as you want by providing details. It will end up looking something like this:

Step 5: Budget and Schedule
In this section, you just need to specify your daily budget and the schedule for your ad:

Make sure you match the “Start” and “End” dates and times of your Facebook ad with the ones you entered earlier on Amazon while setting up the promotion.
Scroll down and hit “Continue”.
Step 6: Set up Ad Creative
This is where you’ll actually design the look of your Facebook ad.
First of all, select “Single Image” as the Format of your ad:

After uploading an image, write a creative “Text” for your ad:

You also can look at the Ad Preview on the right side to see how your ad will appear to audiences on their Facebook feed.
Scroll down and hit “Confirm”.

Click “Continue” on the next page:

Step 7: Set a Daily Limit for your Coupons (Optional)
For one-time coupons, you don’t want to give away all your codes on the very first day of your ad. Instead, you want your ad to keep running for a few days so that you can maximize your ad’s reach-out.
One way you can do this is to manually keep track of the “Results” of your ad.

For example, if you want to give out only 20 codes per day then you can keep checking this section and as soon as it hits “20”, you can pause your ad for that day.
However, the right and easy way to limit your per-day codes to 20 is to create a rule for your ad:

In the “Create Rule” window, go to the “Conditions” section. Here, select “Results” and enter “20” as your maximum number. Hit “Add”.

Enter a name for your rule and hit “Create” at the bottom right corner.
This is it. Your Facebook ad is now all set to run!
Making Progress on Amazon with Facebook Ad Campaigns – Conclusion
If done right, Facebook ads can take your Amazon promotions to the next level. Facebook is pretty good at finding out appropriate audiences for your ad and targeting them.
By using the right kind of links in your Facebook ads, you can improve your Amazon rankings significantly. This will help you in all of your Amazon goals, like getting the Best Seller Rank etc.
Moreover, due to Amazon’s strict Terms of Conditions, sellers always look for ways to build off-Amazon audiences. You can easily do so on Facebook through ads that use retargeting links.
All in all, Facebook ads can really help you up your game on Amazon if you put a little effort in creating them.
Let us know what you think in the comments below.
Learn how you can improve your amazon ranking on our blog.
Never lose
a lead again

URL shortener with all your retargeting pixels in one place.
Start free trial